How to create anime AI scenes: tools, steps, and pro tips

Imagine watching your original anime character step into a fully realized world, wind catching their hair, a festival lantern glowing just behind them, their eyes tracking someone across a crowded street market. That scene exists in your head right now. The exciting part? AI tools in 2026 can help you pull it out and put it on screen. This guide breaks down every tool, every step, and every pro tip you need to go from blank canvas to a dynamic, personalized AI-generated anime scene that actually looks and feels like yours.
Table of Contents
- What you need: Tools and setup for anime AI scene creation
- Step-by-step process: From character design to animated scene
- Character and scene consistency: Advanced techniques for natural interaction
- Adding audio, voice, and interaction: Post-production for immersive AI anime
- Troubleshooting common issues and optimizing AI-generated anime scenes
- What most anime AI scene guides overlook: Human creativity is irreplaceable
- Bring your AI-powered anime scenes to life with WaifuGen
- Frequently asked questions
Key Takeaways
| Point | Details |
|---|---|
| Essential tools | You need text-to-image, pose control, and video AI models plus editing software for best results. |
| Workflow matters | Following a clear, step-by-step process leads to more consistent and engaging anime scenes. |
| Consistency techniques | Leverage ControlNet and prompt presets to keep your characters and art style steady across scenes. |
| Human creativity counts | AI is a powerful assistant, but your own direction and storytelling deliver the best results. |
| Troubleshooting is key | Anticipate technical hiccups and iteratively refine output using proven benchmarks and manual adjustments. |
What you need: Tools and setup for anime AI scene creation
Before you start generating anything, knowing what’s in your toolkit saves a lot of frustration later. The anime AI scene creation process involves a multi-step workflow: character design using text-to-image AI, detailed scene prompting, video generation, clip stitching, and final editing with lip-sync and voiceovers. Each stage requires a different tool, and mixing them strategically is where the magic happens.
Here’s a quick comparison of the core tools and what they’re best at:
| Tool | Primary use | Best for |
|---|---|---|
| Midjourney | Text-to-image | Stylized character art, backgrounds |
| Stable Diffusion | Text-to-image + fine-tuning | Custom model training, LoRA integration |
| ControlNet | Pose and layout control | Precise character positions, expressions |
| insMind / DomoAI | Image-to-video | Animating still images into short clips |
| Seedance / Kling | Text-to-video | Dynamic action scenes, fight sequences |
| CapCut / DaVinci Resolve | Video editing | Clip stitching, color grading, voiceovers |
For customizable AI art, you’ll also want to think about your hardware and asset setup before diving in:
- 🖥️ GPU: NVIDIA RTX 3060 or higher recommended for running Stable Diffusion locally
- 💾 RAM: 16GB minimum; 32GB for smoother multi-model workflows
- 📁 Character sheets: Front, side, and back reference images of your character
- 🎨 Style references: Saved image samples that lock in your target art style
- 📝 Prompt library: A saved collection of tested prompts for backgrounds, poses, and moods
- 🔗 ControlNet modules: OpenPose, Canny, and Depth for pose control (OpenPose for skeleton mapping, Canny for edges, Depth for 3D spatial structure)
Pro Tip: If you’re building a recurring character, train a LoRA (a lightweight fine-tuned model) on 15 to 30 reference images of that character. This keeps their face, hair, and style consistent across every scene, which is essential for storytelling arcs.
The role of anime outfits in storytelling is bigger than you’d think too. When you define your character’s costume in your prompt and reference sheet early on, it prevents weird visual drift later in the pipeline.
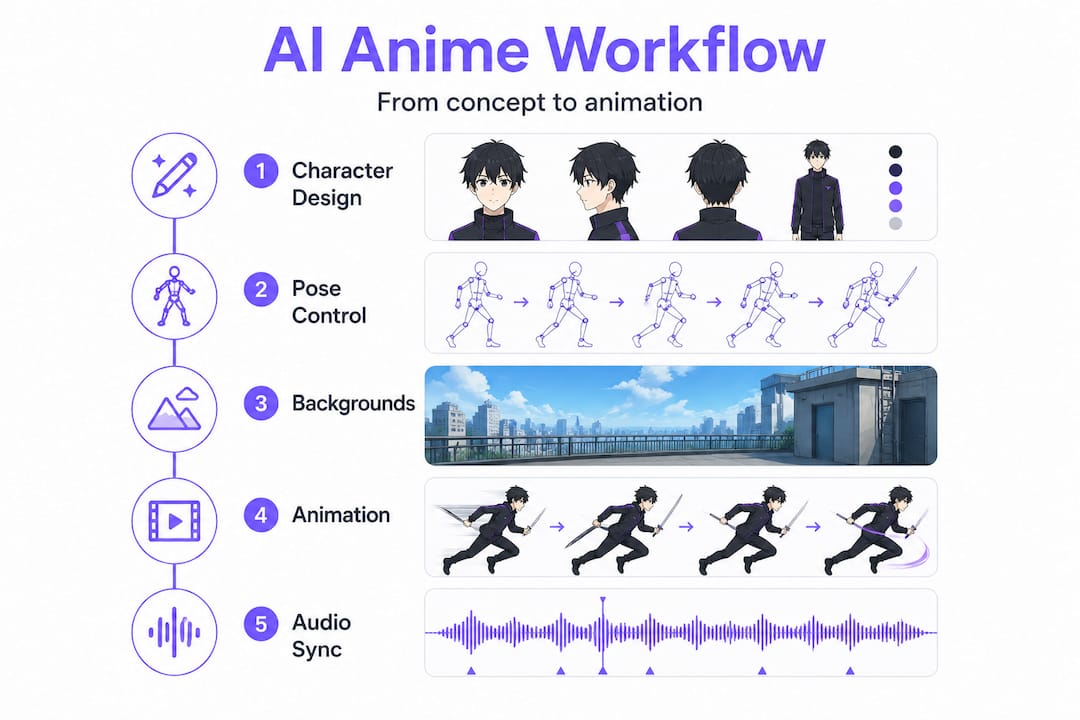
Step-by-step process: From character design to animated scene
With all your tools ready, let’s walk through the full workflow for bringing your AI anime scenes to life. This is where everything connects.
-
Generate your base character. Use Midjourney or Stable Diffusion with a detailed prompt. Include art style, hair color, eye shape, outfit details, and pose. Example: “anime girl, long silver hair, amber eyes, red festival kimono, standing pose, soft bokeh background, Studio Ghibli style, high detail.”
-
Build the scene prompt. Describe the setting, lighting, time of day, and any other characters. ChatGPT can help with generating character names, backstories, and scene descriptions that give your prompt more emotional depth.
-
Apply ControlNet for pose and composition. Load your character image into Stable Diffusion with ControlNet active. Use OpenPose to lock in the body position, Canny to preserve fine edge details, and Depth to keep the background feeling spatially correct. This step is what separates flat-looking AI art from something that genuinely feels composed.
-
Generate the animated clip. Feed your finalized scene image into a video model. Advanced video models like insMind (OmniVideo 2.0 and Kling 3.0), Seedance 1.5 Pro, and the open-source AniSora from Bilibili all support image-to-video conversion, frame interpolation, and localized guidance with spatiotemporal masks. For fight scenes or high-action sequences, Seedance 2 excels with 5-second clips that you can chain together for longer sequences.
-
Stitch your clips. Import everything into CapCut or DaVinci Resolve. Arrange your clips in narrative order, apply transitions, and adjust timing so motion feels natural.
-
Add audio and dialogue. Lay down background music, sound effects, and voiceover. Use lip-sync tools like Wav2Lip or D-ID to match mouth movements to your character’s speech.
-
Final review and export. Watch the full sequence at least twice. Look for jittery frames, visual artifacts, or audio sync issues. Export in 1080p for sharing online.
Here’s a summary table to keep handy during production:
| Step | Tool | Key goal | Pro tip |
|---|---|---|---|
| Character generation | Midjourney / SD | Consistent base design | Use LoRA for recurring characters |
| Scene prompting | ChatGPT + SD | Emotional depth and setting | Save prompts to a library |
| Pose control | ControlNet (OpenPose) | Natural body positions | Always test in low-res first |
| Video generation | insMind / Seedance | Smooth animation | Chain 5-sec clips for action scenes |
| Clip editing | DaVinci Resolve / CapCut | Narrative flow | Match cuts to audio beats |
| Audio and voice | Wav2Lip / D-ID | Lip-sync realism | Record scratch audio first |
Pro Tip: For creative uses for AI anime, chain multiple short clips instead of trying to generate one long video. Five-second clips are more controllable and far easier to fix when something goes wrong. Think of it like storyboarding: short shots, assembled into something greater.
Visual storytelling with AI really shines when each shot has a clear purpose. Don’t generate randomly. Plan your shots like a director would.
Character and scene consistency: Advanced techniques for natural interaction
Now that you know the process, let’s talk about keeping everything visually consistent, because nothing breaks immersion faster than your hero changing hairstyles between scenes.
ControlNet modules are your best friends here. OpenPose extracts the skeleton from a reference image and applies it to new generations, so your character holds the same stance. Canny captures fine edge details like clothing folds and facial structure. Depth maps ensure the background maintains a believable 3D relationship with the foreground character.
Beyond ControlNet, here are additional tools and practices for scene consistency:
- 🎨 Style presets: Save your Stable Diffusion settings as a template, including sampler, CFG scale, and steps
- 🖼️ Reference panels: Keep a dedicated folder with approved character frames for every emotion and pose
- 🎭 Prompt locking: Write a “core prompt” for each character that you paste at the start of every generation
- 🎞️ Frame interpolation: Use tools like RIFE or built-in Seedance interpolation to smooth motion between frames
- 🔍 Color palette matching: Tools like Coolors or Adobe Color help you maintain the same hue and saturation across scenes
“AniSora was trained on a dataset of 10M+ clips and evaluated on a 948-video benchmark measuring character consistency, art style consistency, motion smoothness, and distortion, outperforming current state-of-the-art models.”
That level of testing tells you something important: even top-tier AI models are being rigorously evaluated for the exact consistency problems you’re trying to solve. The tools are getting better, but your workflow habits matter just as much.
Pro Tip: Save a “seed” value in Stable Diffusion after generating a character you love. The seed locks in a specific randomness pattern, making it much easier to recreate the same look in future sessions.
Thinking about character personality traits during your design phase also helps. A character’s personality should show up in their posture, their outfit details, and even how they’re lit. These choices make your scene feel authored, not just generated. Exploring different anime art styles early helps you commit to a visual language that stays consistent across every shot.
Adding audio, voice, and interaction: Post-production for immersive AI anime
Completing your visuals is just the start. Authentic audio, dialogue, and interactivity are what elevate your anime scene from a cool image sequence to something that actually feels alive.
Here’s how to approach the audio and interaction layer:
-
Write your dialogue first. Before recording or synthesizing anything, write out the full script. Even short scenes benefit from knowing exactly what each character says and when.
-
Generate or record voiceovers. Tools like ElevenLabs let you create custom AI voices with a specific tone and accent. For role-play driven scenes, matching the voice to the character’s personality adds enormous immersion.
-
Apply lip-sync. Run your final video clip and the audio through Wav2Lip or D-ID’s lip-sync feature. Adjust frame timing manually if the sync feels off.
-
Layer sound effects. Add ambient audio like crowd noise, rain, or fire crackling to match the scene setting. Freesound.org offers a large library of creative commons sounds for non-commercial use.
-
Add background music. Choose tracks that match the emotional tone of the scene. Platforms like Pixabay Music and Artlist provide royalty-free anime-style BGM.
-
Final timing pass. Watch the full scene with audio and check that character actions match audio cues. Adjust clip speed or audio timing as needed.
⚠️ Important: Always verify that any audio assets you use are royalty-free or licensed for your intended use. Using copyrighted music or character voice samples without permission can get your content taken down, especially on platforms like YouTube or TikTok.
Pro Tip: Use memory-enabled AI characters for responsive role-play interactions. When an AI companion remembers your character’s backstory and current arc, the dialogue it helps generate feels far more organic and consistent with your narrative.
The lip-sync and voiceover stage is also where you can inject real personality. A slight pause before a dramatic line, a soft laugh at an unexpected moment. These tiny audio choices are what human creators add that pure generation can’t replicate on its own. For more depth on realistic AI chat that makes dialogue feel genuine, the same principles apply whether you’re writing a scene or having a live conversation with an AI character.
Using character LoRAs for consistency in personalized storytelling, combined with chaining short clips for interactive scenes, is the approach the most experienced AI anime creators rely on today.
Troubleshooting common issues and optimizing AI-generated anime scenes
No process is perfect. Here’s how to tackle the most frequent stumbling blocks and push your results even further.
Common mistakes to avoid:
- Over-relying on AI without reviewing output frame by frame
- Skipping the manual editing pass after video generation
- Using generic prompts that produce generic results
- Ignoring resolution mismatches between video clips during stitching
Quick fixes for common artifacts:
- 🔧 Flickering frames: Use frame interpolation with RIFE to smooth transitions
- 🔧 Distorted hands or faces: Upscale and inpaint problem areas in Stable Diffusion’s img2img mode
- 🔧 Style drift between clips: Use the same LoRA, seed, and core prompt for every scene
- 🔧 Choppy motion: Increase frame rate through interpolation or reduce animation complexity
- 🔧 Color inconsistency: Apply a LUT (lookup table) across all clips in your video editor
The AniSora benchmark data using 10M+ clips and a 948-video evaluation set shows that even the best models score imperfectly on distortion and motion smoothness. If industry-leading AI models have these challenges, your workflow absolutely needs a manual review layer.
An important perspective worth keeping in mind: WIT STUDIO actually replaced an AI-generated opening with a traditionally animated one after significant audience backlash. AI is a powerful tool for rapid iteration and prototyping, but it’s not a final production solution on its own. The best results always come from treating AI output as a starting point, not a finished product.
What most anime AI scene guides overlook: Human creativity is irreplaceable
Here’s the honest truth that most tutorials won’t tell you. The tools are genuinely incredible right now. You can generate a stunning anime character, drop them into a glowing neon cityscape, animate them walking through rain, and lip-sync them to a perfectly crafted voiceover. All in an afternoon. That’s remarkable.
But the scenes that actually resonate with an audience are the ones where a human made deliberate choices. Which angle? What emotion is on her face in this moment? Does the music swell here or hold back? Those decisions aren’t coming from your prompt. They’re coming from you.
The WIT STUDIO situation is a real lesson. Audiences noticed when AI replaced human artistic judgment at the production level. They didn’t just notice. They pushed back hard enough that the studio reversed the decision. AI helps you prototype, iterate, and realize ideas faster than ever before. But the vision still has to be yours.
The creators seeing the best results in creative storytelling with AI are the ones treating these tools like a very fast, very capable assistant. They write the story. They direct the shots. They make the emotional choices. AI executes. That hybrid workflow is where the magic lives.
Pro Tip: After generating a scene, watch it without sound and ask yourself: “Does this tell a story without audio?” If the answer is no, go back and adjust the visuals before adding any audio layer.
Bring your AI-powered anime scenes to life with WaifuGen
You now have the full toolkit: the right software, a clear step-by-step process, consistency techniques, audio workflows, and troubleshooting strategies. The next step is actually doing it, and WaifuGen makes the starting point a lot more fun.
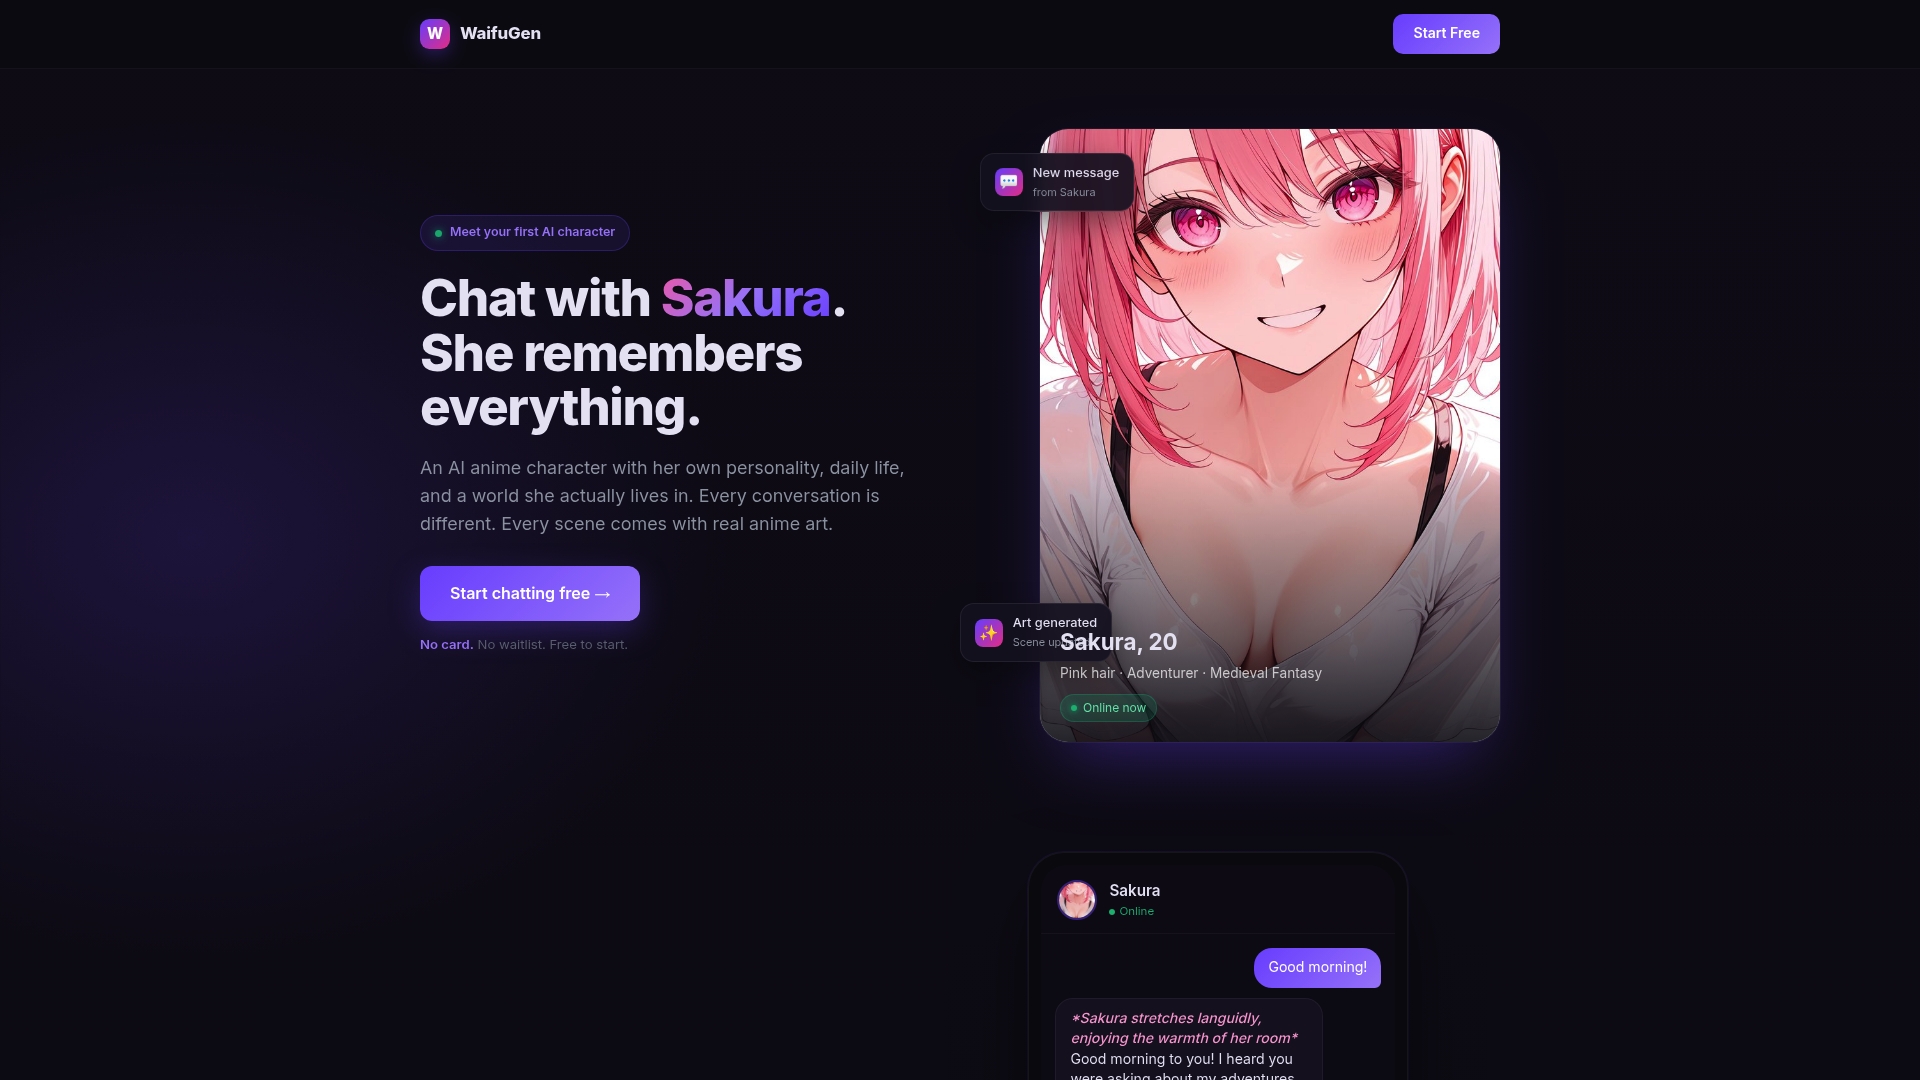
With WaifuGen’s AI anime character chat, you can test your character concepts in real conversation before you spend hours generating scenes. See how your character’s personality feels in dialogue, refine their voice, and get a feel for their emotional arc. The platform’s custom AI character chat lets you bring any character concept to life with dynamic memory and evolving scenes. And if you want a companion who actually remembers your story sessions and grows with you over time, explore AI girlfriend chat for a deeply personal and immersive anime-style experience.
Frequently asked questions
What is the fastest way to create an AI-generated anime scene?
The fastest approach is to use a text-to-image model like Midjourney or Stable Diffusion for characters and backgrounds, then a text-to-video model like insMind or Seedance to animate key moments and stitch the result in a lightweight editor like CapCut.
How do I keep my AI anime characters consistent across scenes?
Use ControlNet modules with Stable Diffusion, specifically OpenPose for body position and Canny for edge detail, and maintain a saved reference image folder and locked core prompt for every character.
Can AI-generated anime scenes be used in commercial projects?
Most AI-generated assets can be used commercially, but always check the specific license of each model and platform you use, and avoid incorporating copyrighted character likenesses or music without permission.
What are the main limitations of AI anime scene creation?
AI is excellent for rapid prototyping and idea development but often lacks the emotional nuance and artistic intentionality of a human creator, as shown when WIT STUDIO reversed an AI-generated production decision after audience backlash.
Are there benchmarks for judging the quality of AI anime scenes?
Yes, models like AniSora are evaluated on a 948-video benchmark using metrics for character consistency, art style consistency, motion smoothness, and distortion, giving creators a measurable standard to compare tools against.